Node Programing Guide
Overview
Learn how to program and deploy a node using PSoC Creator and a MiniProg3!
Tools Required
- Computer (with Cypress PSoC Creator)
- Depth Node or Valve Node
- PSoC MiniProg3 Program and Debug Kit
Build Instructions
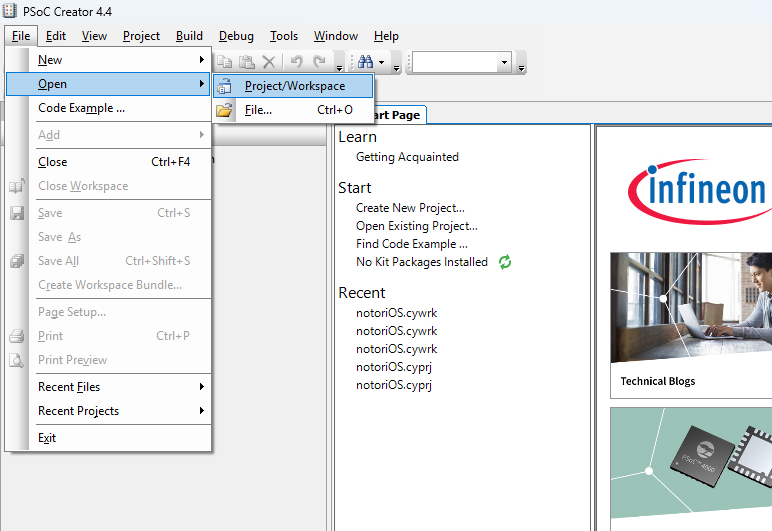
Step 1: Open PSoC Creator

- Launch PSoC Creator 4.4
Step 2: Load the Workspace


- Open and build the sensor node’s code:
- Navigate to File → Open → Project/Workspace
- Browse to the perfect-cell directory
- Open the workspace: notoriOS.cywrk
- Go to Build → Build notoriOS
- Wait for the build process to complete
- You may see warnings or notes during compilation but these can typically be ignored
- Look for the “Build Succeeded!” message in the output window
Step 3: Prepare the Node Hardware

- Power the node:
- Connect the battery: Plug the battery connector into the battery port X1
- Connect the solar panel: Plug the solar panel connector into port X11

- Connect the node to your computer:
- Connect the PSoC MiniProg3 to the white 5-pin debug port on the board
- Ensure all connections are secure before proceeding
Step 4: Program the Board

- Select Target Device:
- From the toolbar, select Debug → Select target and program


- Configure Port Settings:
- Select MiniProg3
- Click the “Port setting” button
- Configure the following settings:
- Active Protocol: SWD
- Connector: 5-pin type
- Acquire: Reset
- Clock speed: 1.6 MHz
- Power source: External
- Must be set to external to prevent board damage
- Click “OK”


- Connect and Program:
- Select PSoC 5LP
- Click “OK / Connect” to establish connection
- Wait for the programming process to complete
- You should see a “Device was successfully programmed” message when programming is successful
Step 5: Ensure the Board is Transmitting Data

- Check the LEDs:
- The blue LED indicates when the node is actively sending data to the dashboard
- After data transmission, the node enters sleep mode
- This cycle repeats automatically during normal operation
- Congrats! You successfully programmed your node!